Article
Zero Trust Network Access: Microsoft Entra Private Access
Following on from my introduction to Zero Trust Network Access (ZTNA) , this post focuses on the deployment and configuration of Entra Private Access.

Following on from my introduction to Zero Trust Network Access (ZTNA), this post focuses on the deployment and configuration of Entra Private Access.
Using a combination of my Azure tenant and home lab environment, I’ll walk through the practical steps involved in setting up and testing Microsoft’s ZTNA offering. This post is aimed at those looking to get hands-on with Entra’s Private Access. Internet Access will be covered in a future post.
The areas covered include:
- Connector Deployment Setting up and configuring the Microsoft Entra Private Access connectors within my home lab, enabling outbound connections from internal apps to Microsoft’s edge network.
- Quick Access Using Quick Access for basic testing of connector-to-application reachability, bypassing the need for full per-app policy creation during initial validation.
- Per Application Access & Conditional Access Integration Defining specific internal applications and applying Conditional Access policies based on user identity, device compliance, and other contextual signals to demonstrate segmented, policy-driven access control.
The overall architecture of my deployment is as follows:
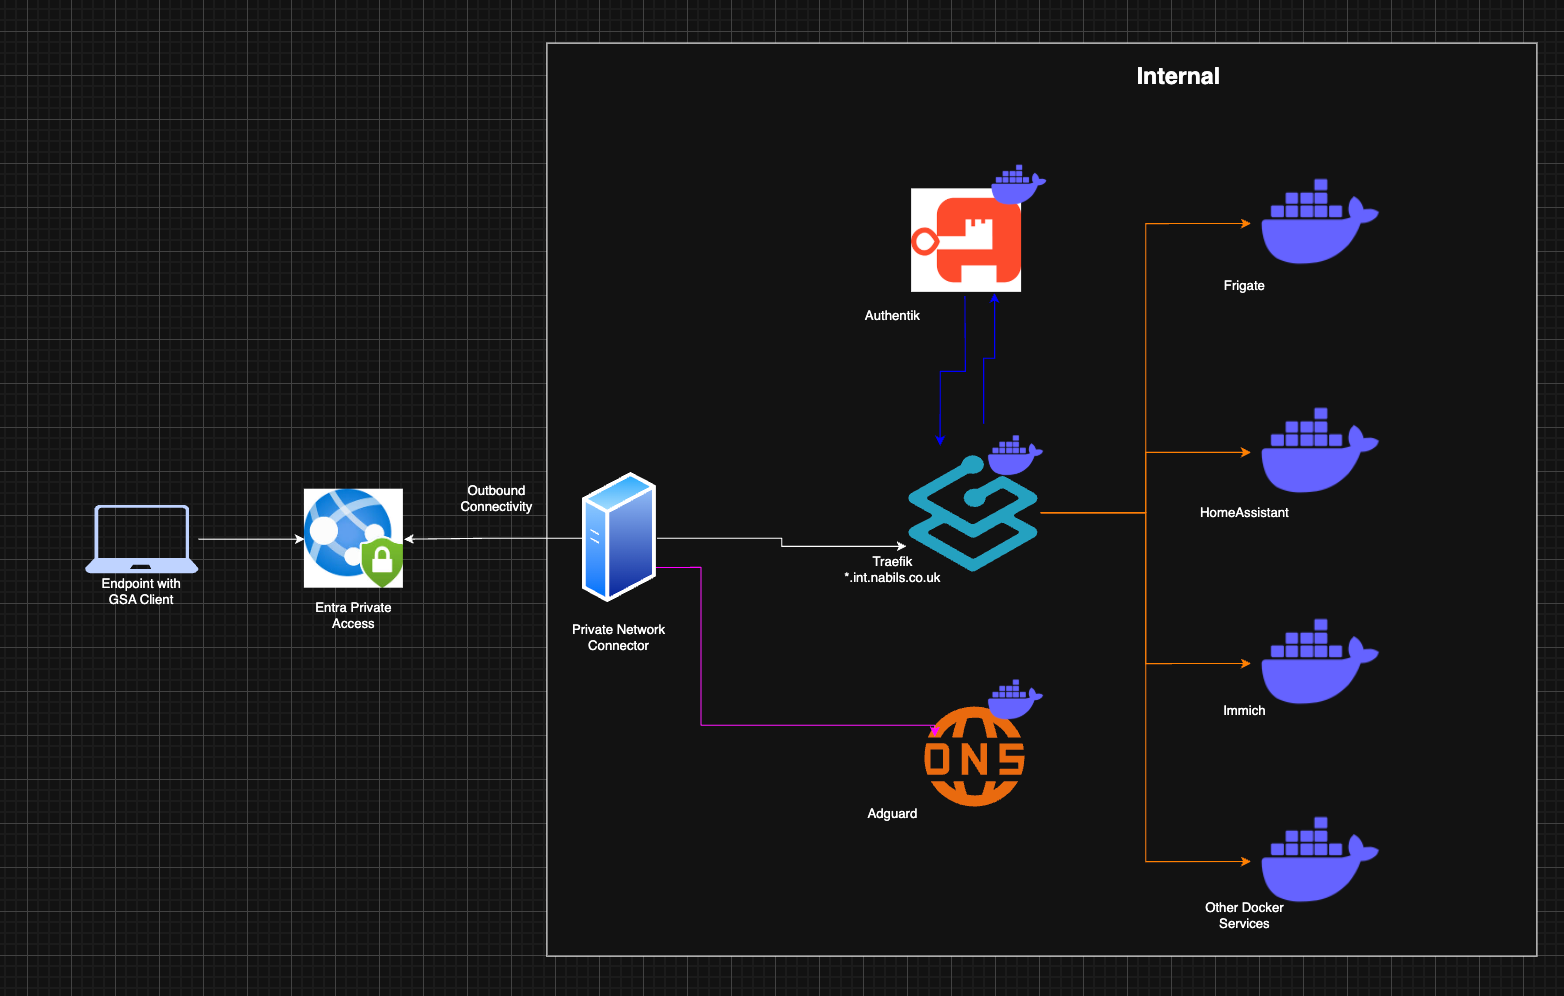
Example Setup
An Azure Virtual Machine in an isolated VNET acts as the user endpoint in the lab and a Private Network connector installed on a VM in my lab.
The applications accessed include several services running on-premises, described in more detail in my earlier home lab post.
This setup provides a testbed for validating Microsoft’s ZTNA approach. However, in a production environment I’d recommend a minimum number of two connectors per location for availability.
Implementation Approach
When approaching a deployment of Microsoft Global Secure Access, it’s recommended to begin with a proof of concept (PoC). This allows you to validate core functionality in a controlled environment, assess compatibility with your existing infrastructure, and identify any early challenges.
Once the PoC has proven successful, the next step is to expand into a pilot phase. This typically involves a defined user group and a small set of critical applications. The pilot enables you to fine-tune policies, evaluate user experience, and gather feedback before rolling out the solution more broadly across the organisation.
This phased approach ensures that any technical or operational issues are addressed early, and that stakeholder confidence is established before moving into full production deployment.
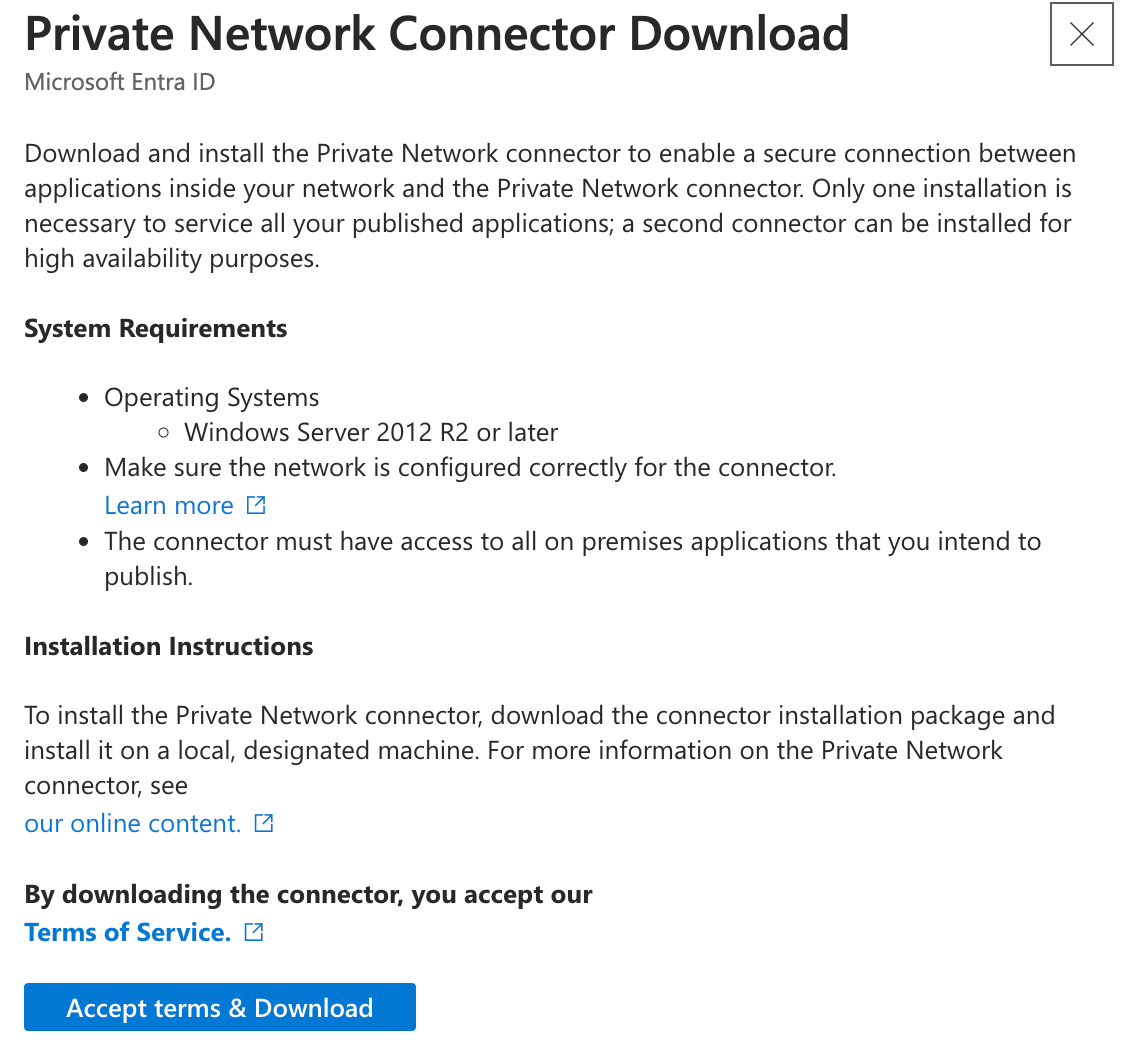
Connector Deployment
The Microsoft Entra Private Access connector must be installed on a Windows Server operating system. The installation package can be downloaded directly from the Microsoft Entra admin portal.
For this lab, no special outbound connectivity configuration was required. However, in a production environment, you’ll need to ensure the server hosting the connector has outbound internet access to specific Microsoft endpoints. This allows the connector to securely communicate with the Global Secure Access cloud service. Microsoft maintains an up-to-date list of required URLs and IP ranges in their official documentation.
Additionally, the connector must have network line-of-sight to the applications it is intended to expose. If there are firewalls, Network Security Groups (NSGs), or other access control mechanisms in place between the connector and the target resources, these must be configured to allow the connector to initiate communication with those services.
During installation, you’ll be prompted to authenticate using an account with appropriate Entra permissions. This process registers the connector to your tenant and allows it to appear within the Global Secure Access portal. Once deployed, the connector maintains outbound-only communication, which significantly simplifies firewall configuration and aligns with Zero Trust principles by eliminating the need for inbound access.
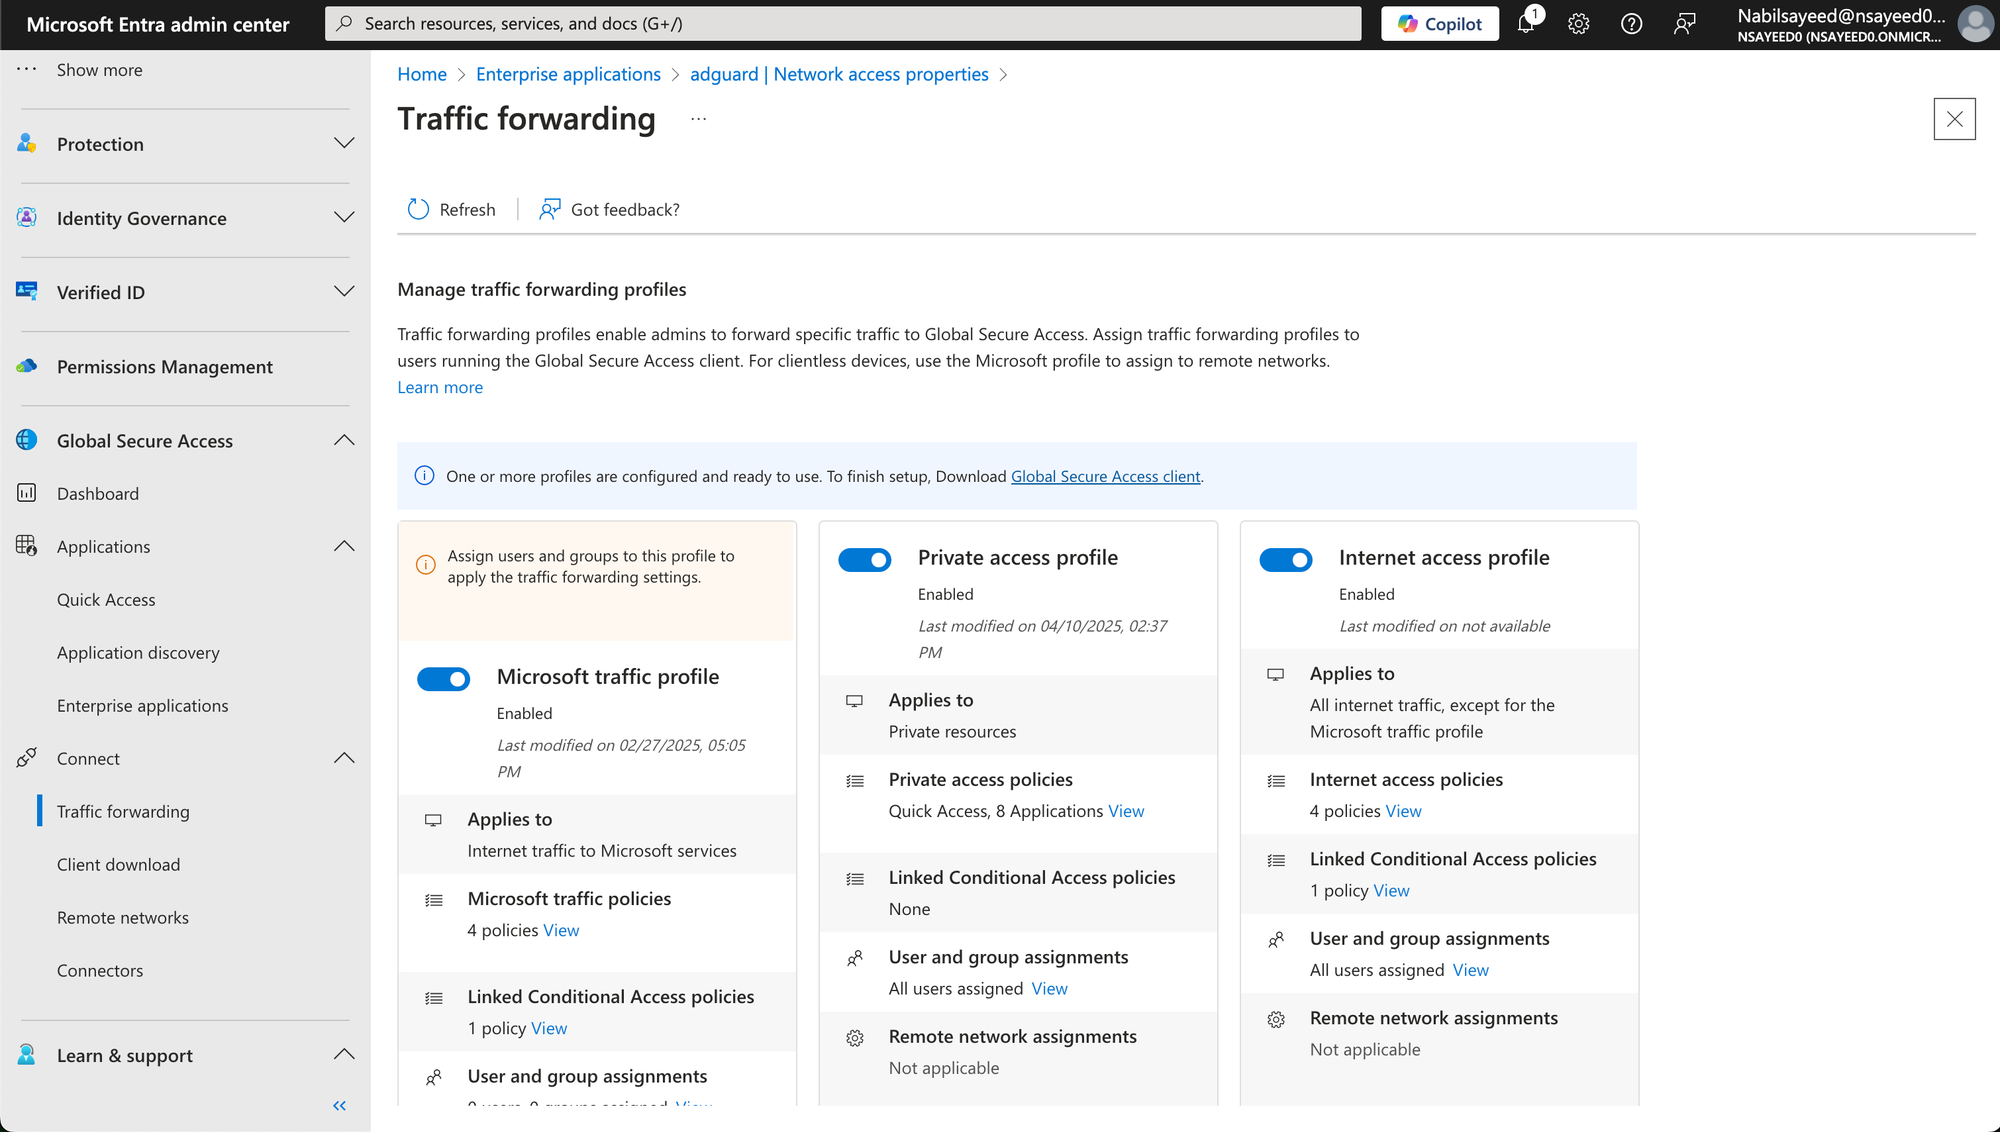
Traffic Forwarding Profiles
To enable traffic routing via the Global Secure Access client, a Traffic Forwarding Profile must be configured and enabled in the Microsoft Entra Admin Centre. This is a straightforward step, essentially a toggle switch that activates traffic forwarding for selected users or groups.
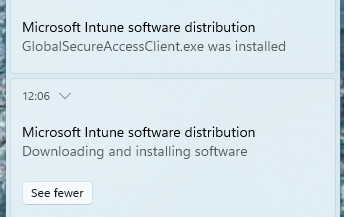
Deployment of Global Secure Access Client to endpoints
I won’t go into too much detail in this section, as organisations will have varying solutions and strategies for deploying applications to user endpoints.
For the purposes of this blog post, I used Microsoft Intune to publish the Global Secure Access Client. In line with the proof of concept → pilot → full rollout approach mentioned earlier, it’s important to limit deployment during each phase to only the users involved.
Quick Access Segments & Private DNS
Quick Access Segments offer the fastest way to get started with Microsoft Entra Private Access. When combined with Application Discovery (in preview at the time of writing), this feature is especially valuable for organisations that may not have a full Configuration Management Database (CMDB) of their internal applications but still want to begin routing traffic to internal resources via Global Secure Access (GSA).
By configuring a Quick Access Segment, administrators can route all traffic destined to a specific FQDN or IP subnet through the GSA client, providing immediate access while gaining visibility into which applications users are actually accessing. This approach enables organisations to move gradually towards a more segmented and policy-driven access model.
In the case of my home lab, the internal network operates on the 192.168.0.1/24 subnet. Applications are typically accessed via:
- Port 443 (HTTPS)
- Port 22 (SSH)
- Port 3389 (RDP)
By configuring a Quick Access Segment for this subnet, I can now access any device or service within this range directly over the GSA client. However, like most environments, users typically do not interact with internal resources by IP address, they use friendly domain names through internal DNS resolution.
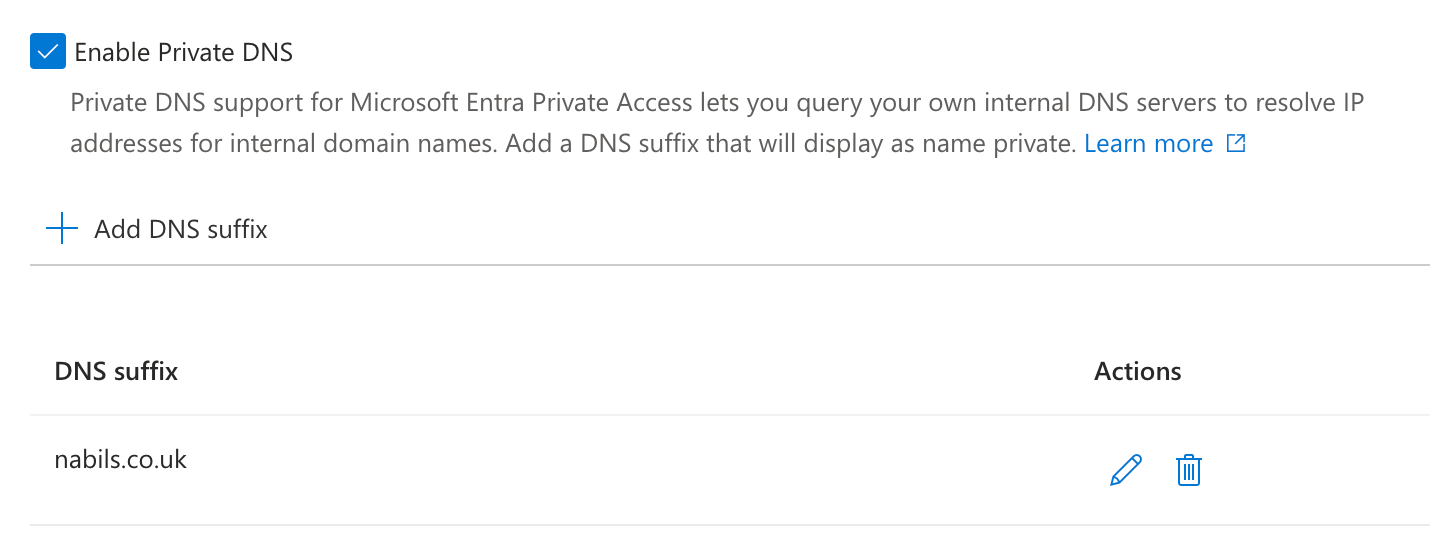
This is where Private DNS comes into play (also in preview at the time of writing). Private DNS in Entra enables domain name resolution via a designated internal DNS server. In my setup, any DNS request to nabils.co.uk is resolved by my local AdGuard DNS server, allowing hostname-based access to internal systems over GSA.
Per App Access
Per application access provides a granular and security-focused way to configure access to internal applications. If your organisation already maintains a comprehensive inventory of internal applications, you may be able to begin defining access policies immediately. If not, the Quick Access approach can serve as a practical starting point, accelerating deployment while supporting ongoing application discovery efforts.
It’s worth noting that this is not an either/or decision. Organisations may choose to use a combined approach. Once the connector is deployed and operational, the next step is to define your internal applications within the Microsoft Entra Admin portal. Before onboarding any application, it’s important to understand the purpose, user base, and security classification of each service. This helps ensure that access controls are aligned with the sensitivity of the application, and appropriate authentication and device requirements are enforced.
In this example, we’ll onboard a few applications from my HomeLab environment, simulating the internal services used by the fictional organisation Nsayeed (introduced in my Zero Trust post):
Applications
- Frigate – A self-hosted network video recorder (NVR).
- AdGuard – An internal DNS server providing ad-blocking and DNS-level control.
- Authentik – An internal identity provider used for reverse proxy and authentication in front of internal services.
When defining access criteria for these applications, it’s important to assess their criticality and the potential impact of compromise. The controls outlined below are applied within this hypothetical organisation. While one could argue that an application like Frigate may warrant stricter controls, the configurations here have been intentionally varied to demonstrate different enforcement capabilities for the sake of this showcase:
Frigate
- Risk: Access could expose live security camera feeds, potentially breaching privacy and physical security.
- Access Criteria: Must be accessed only from compliant devices to ensure device posture meets organisational standards.
AdGuard
- Risk: As the internal DNS server, a compromise could allow DNS hijacking, leading to phishing, data exfiltration, or service redirection across the organisation.
- Access Criteria:
- Restricted to a small group of administrators.
- Access must use phishing-resistant MFA.
- Device must be compliant and managed.
Authentik
- Purpose: Serves as the internal identity layer for apps like Frigate.
- Access Requirement: Must be reachable to allow initial authentication before access to downstream applications is granted. While no conditional access policies are applied directly to this app, it must be defined in Entra for access path resolution.
Once you’ve identified your applications and mapped their access requirements, you can start onboarding them into Entra Secure Access and apply Conditional Access policies to control access based on identity, device, location, and risk.
For those familiar with Conditional Access, this process will feel familiar. If you’re new to it, the following screenshots (below) provide practical examples of how you might configure policies for each scenario.
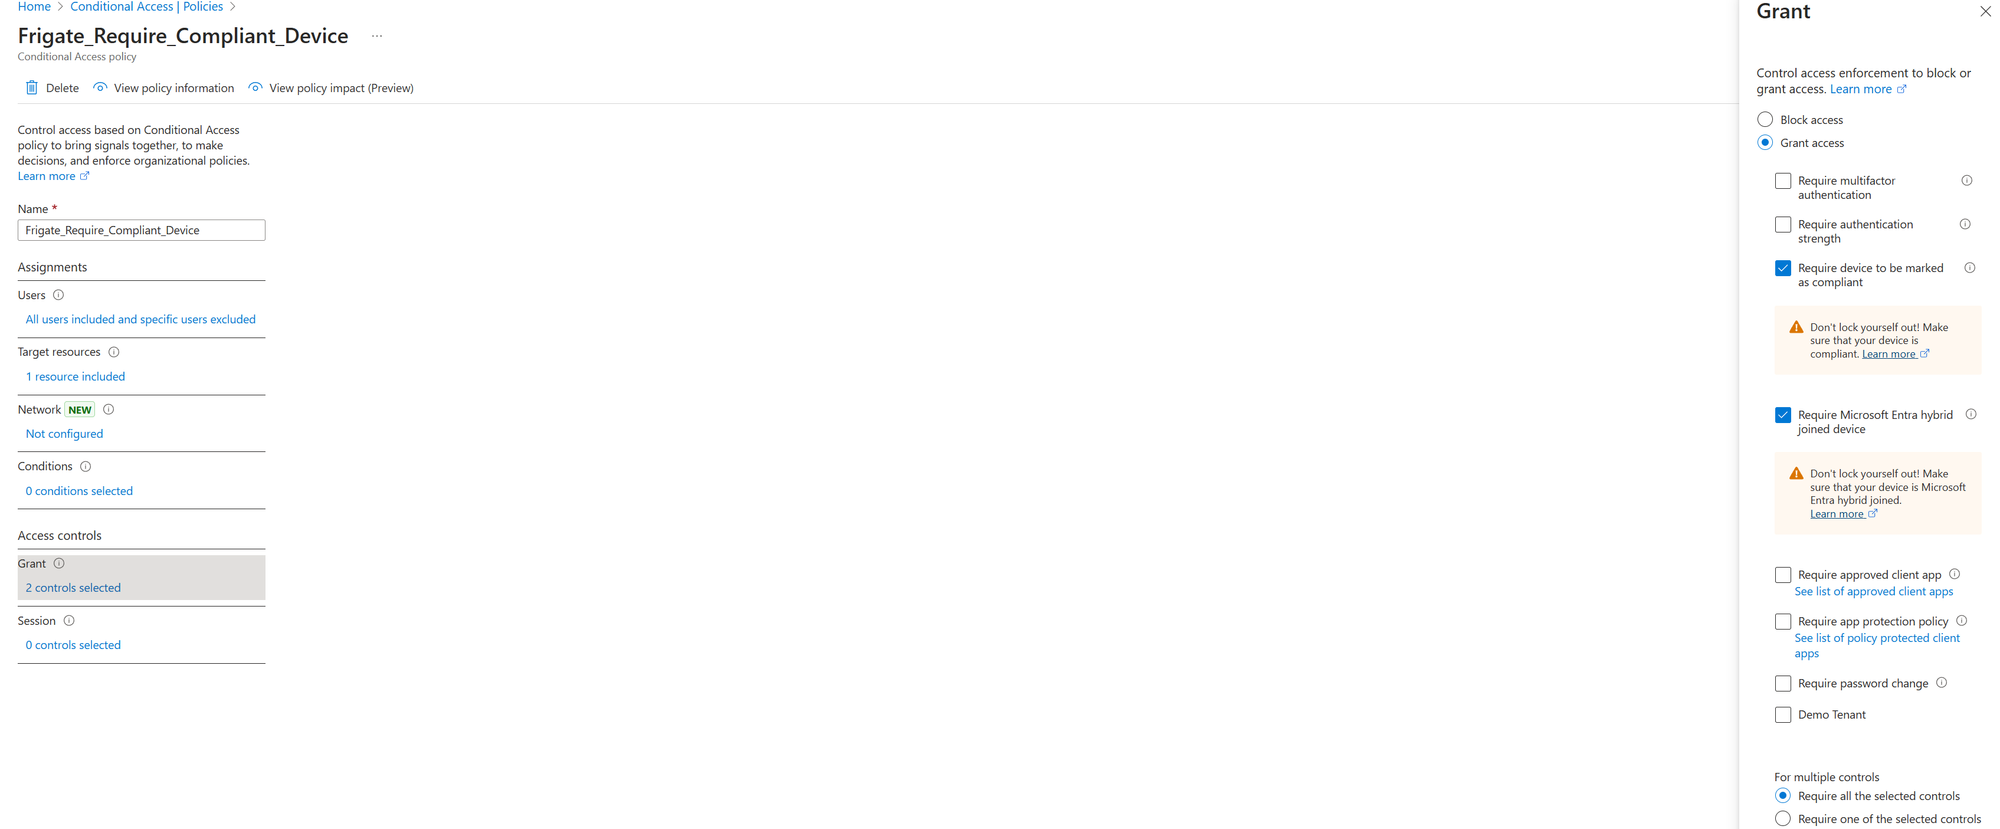
Frigate Require Device Compliance Policy
Non-Compliant Device
To demonstrate the Zero Trust enforcement in action, I initially configured my user endpoint to be non-compliant by disabling real-time threat protection. As expected, when I attempted to access Frigate, access was denied, because the device no longer met the criteria defined in the Conditional Access policy.
This illustrates a core principle of Zero Trust: access is conditional and continuously evaluated, based not only on user identity, but also on the security posture of the device.
If we refer back to my introduction to Zero Trust Network Access, this outcome differs to traditional VPN-based access. Under a legacy VPN model, once authenticated, I would likely have been granted broad access to the network, including Frigate, regardless of my device’s security state.
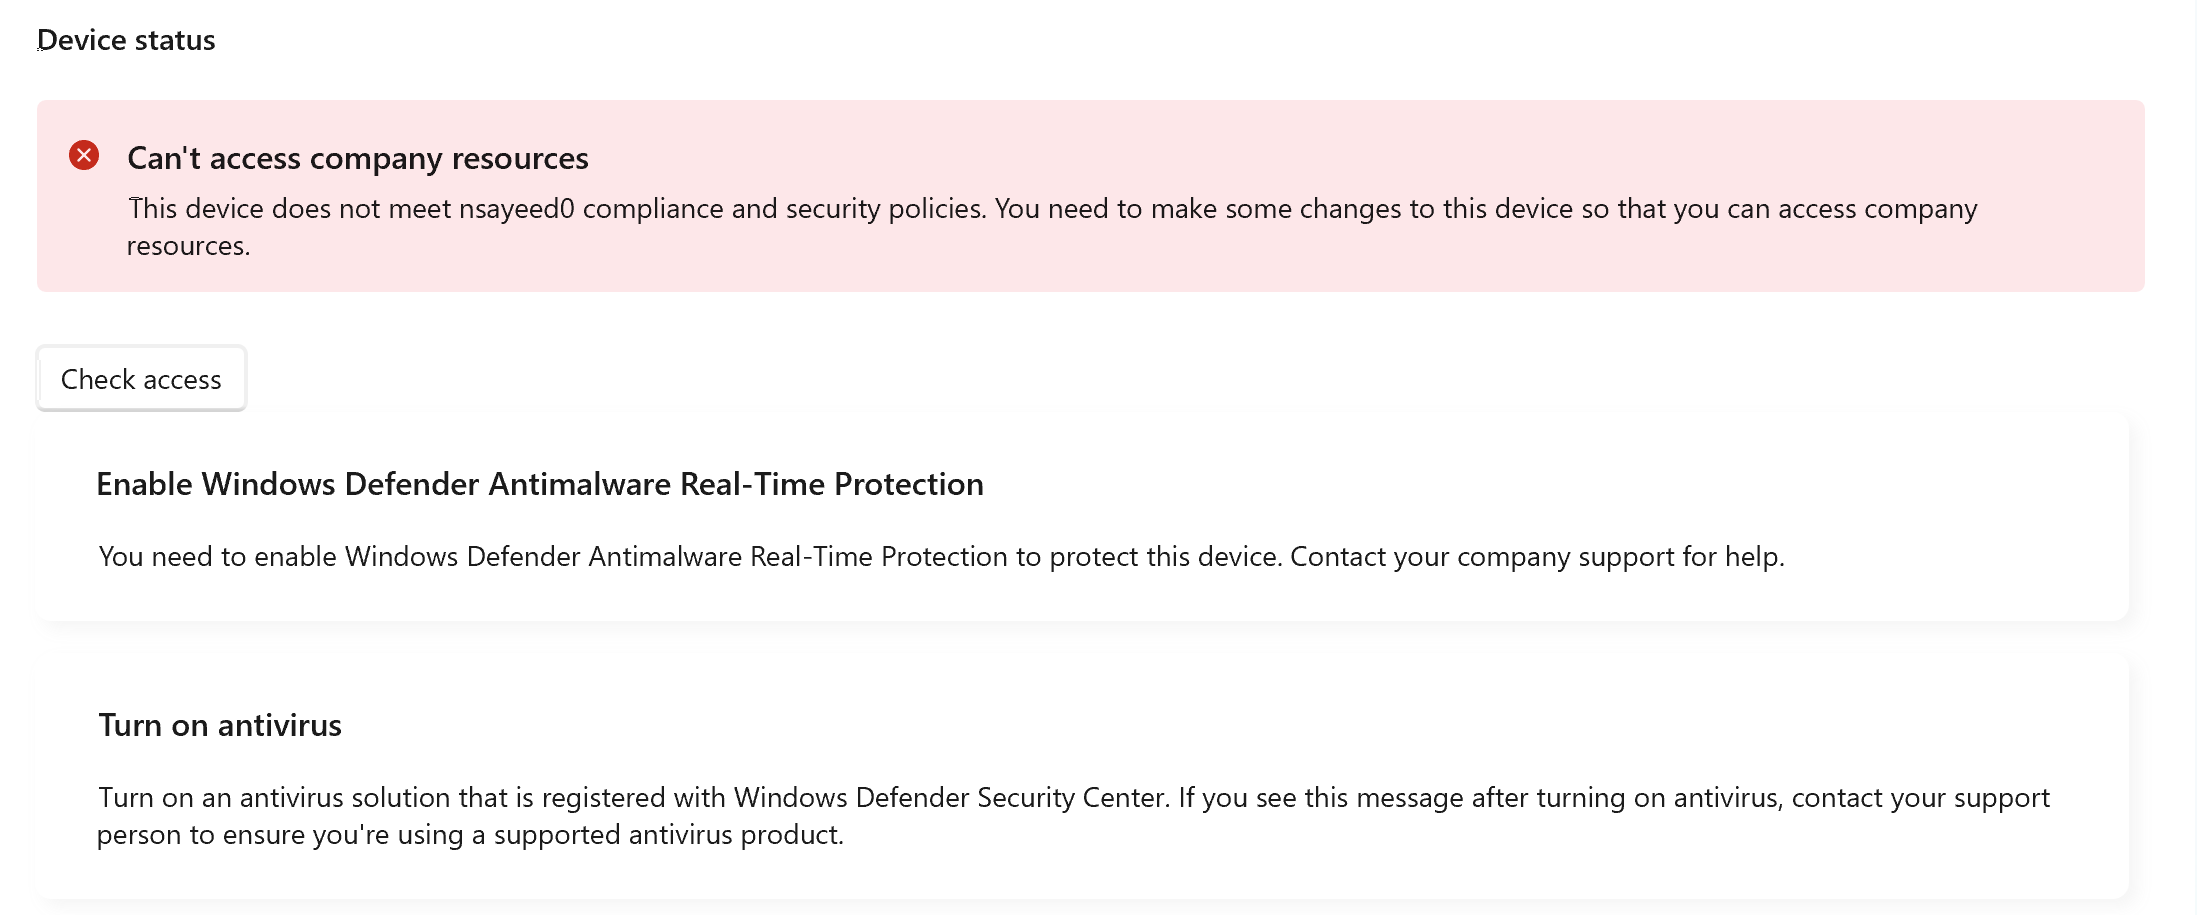
Non-Compliant Device
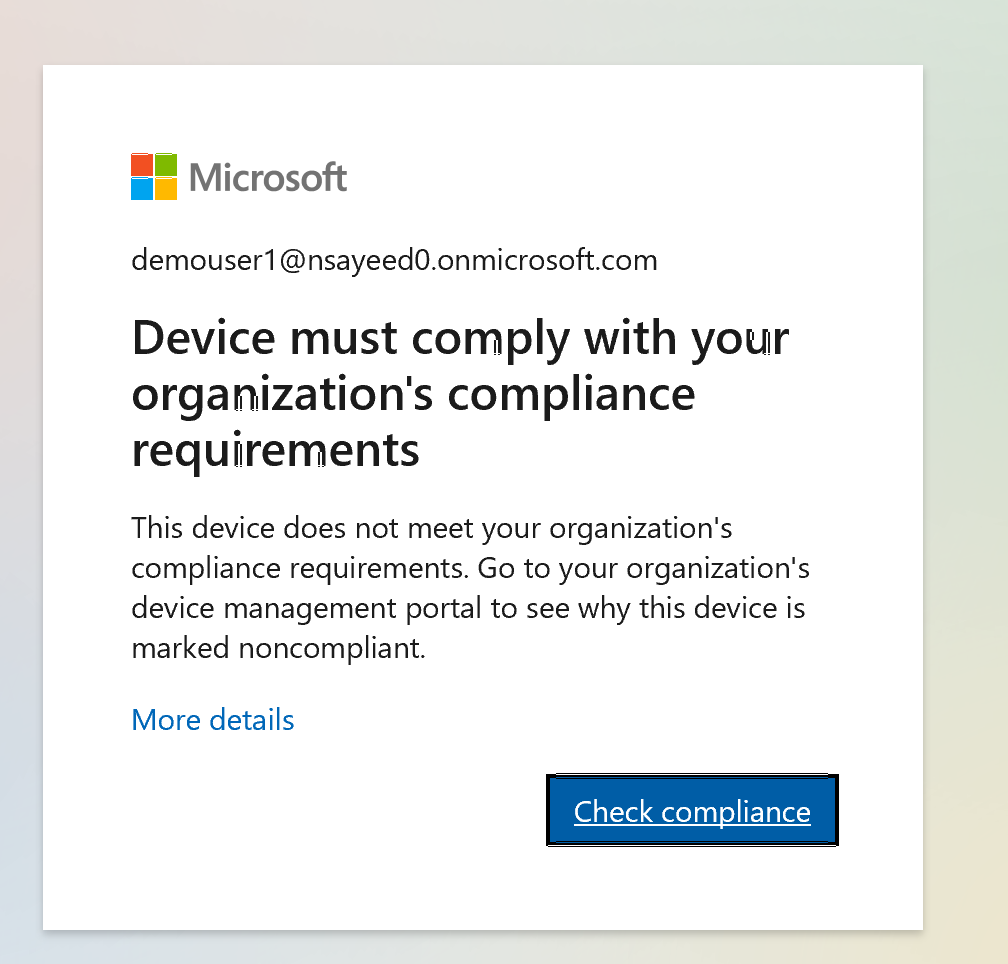
No Access due to compliance
With Microsoft Global Secure Access, I am now able to enforce per-application access policies that are identity and device-aware. This ensures that even if valid credentials are used, access is not granted unless all contextual requirements are met, aligning with Zero Trust principles.
Compliant Device
To demonstrate this further, once I re-enabled real-time threat protection, my device returned to a compliant state. With the endpoint now meeting the required conditions defined in the Conditional Access policy, I was able to successfully access Frigate.

Turned on Antivirus & Threat Protection to move device into a compliant state
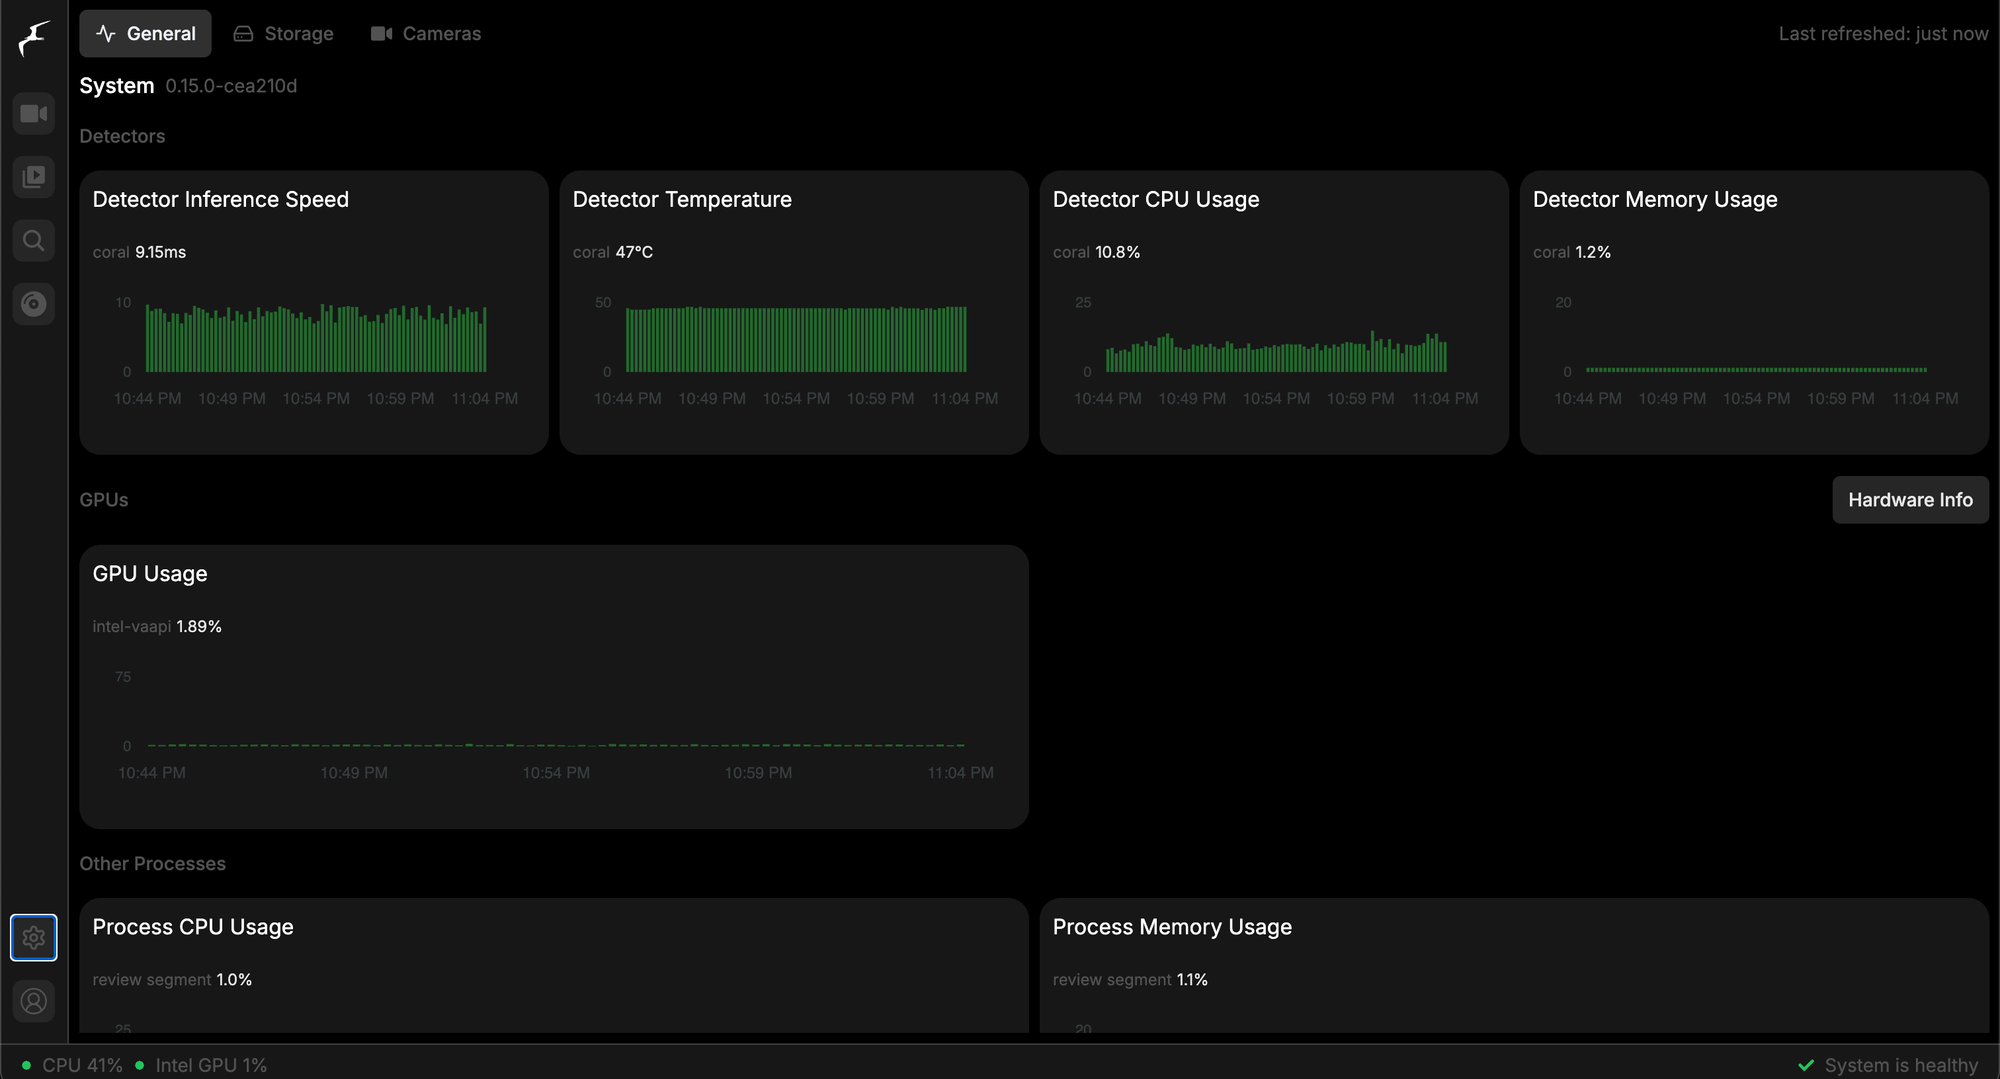
Frigate Settings Page (To avoid showing my cameras 😄)
Authentication Strength
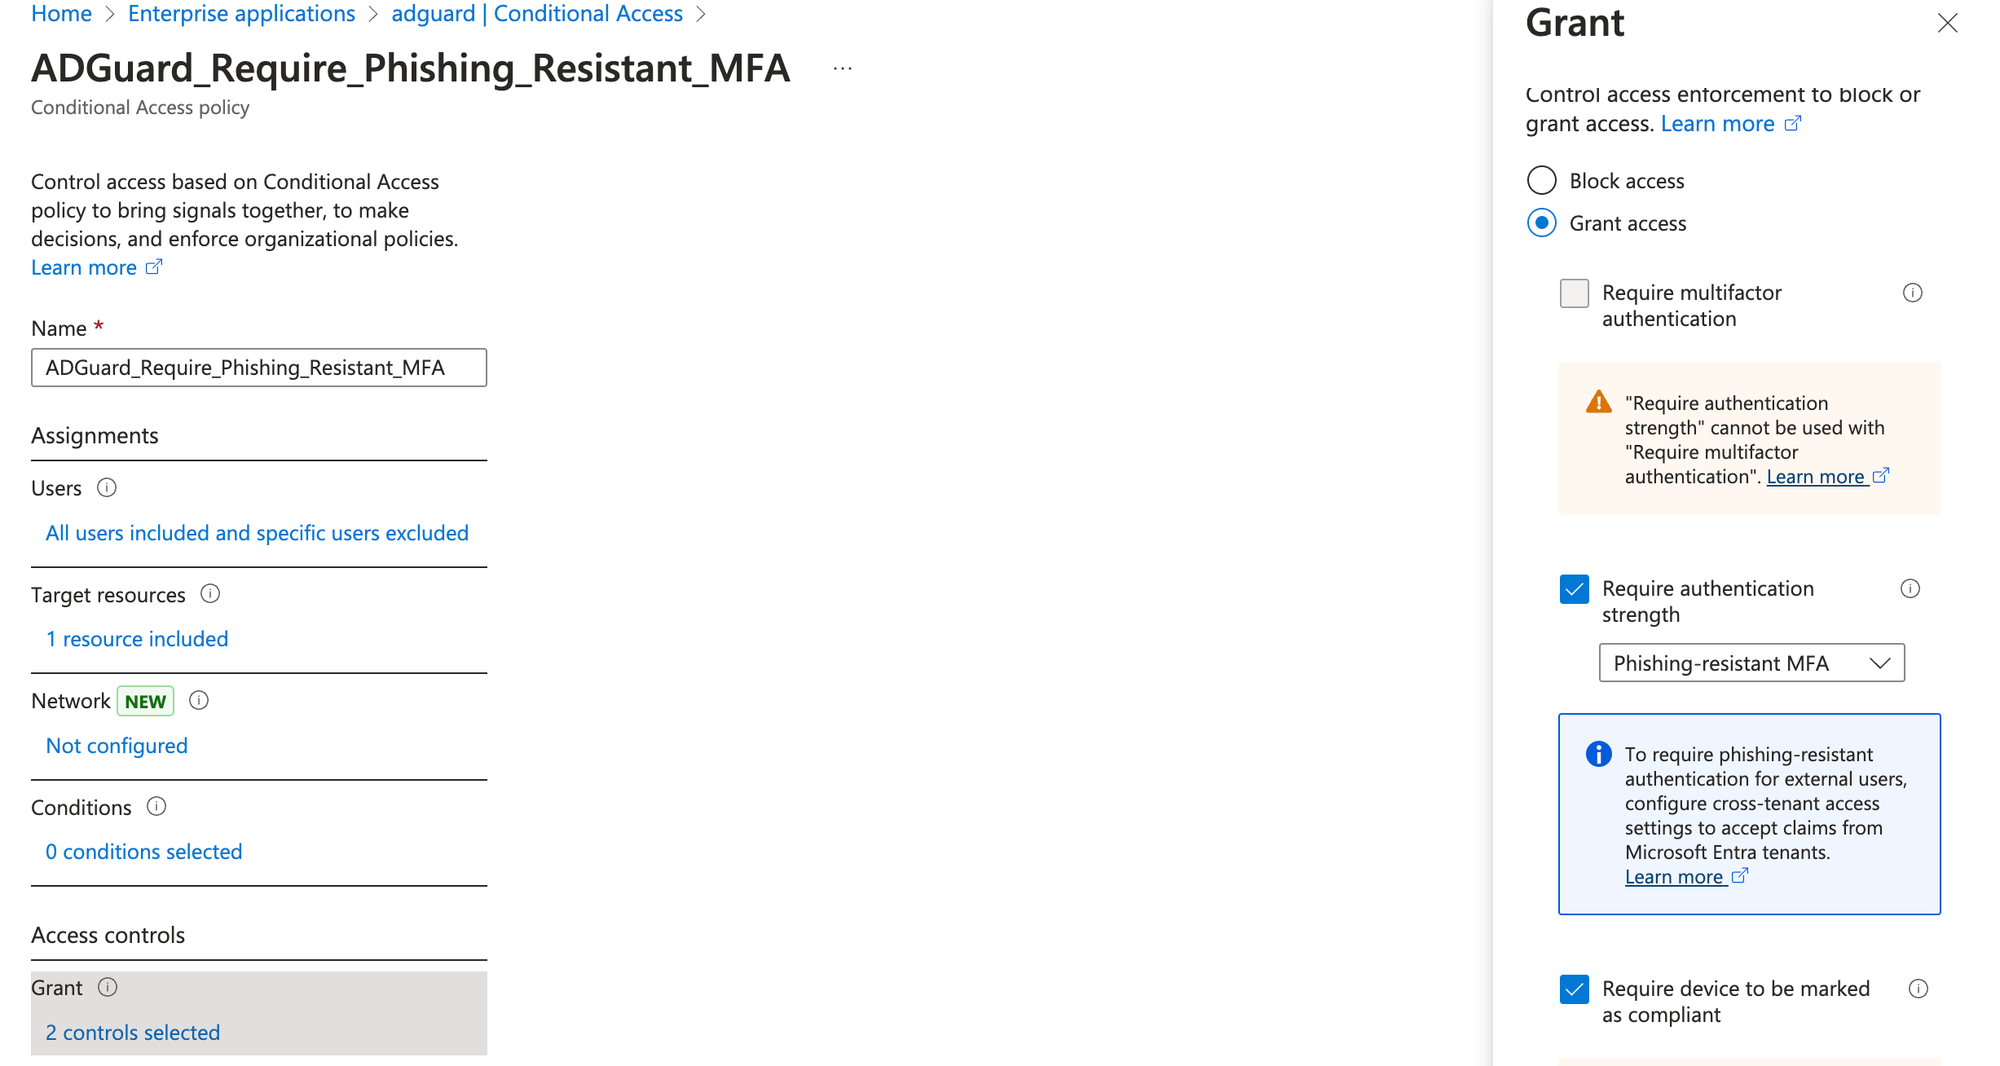
To demonstrate the enforcement of authentication strength, I configured access to the second application AdGuard, to require phishing-resistant multi-factor authentication (MFA). In the access policy, I specified that only administrators who meet this stronger authentication requirement would be allowed access.
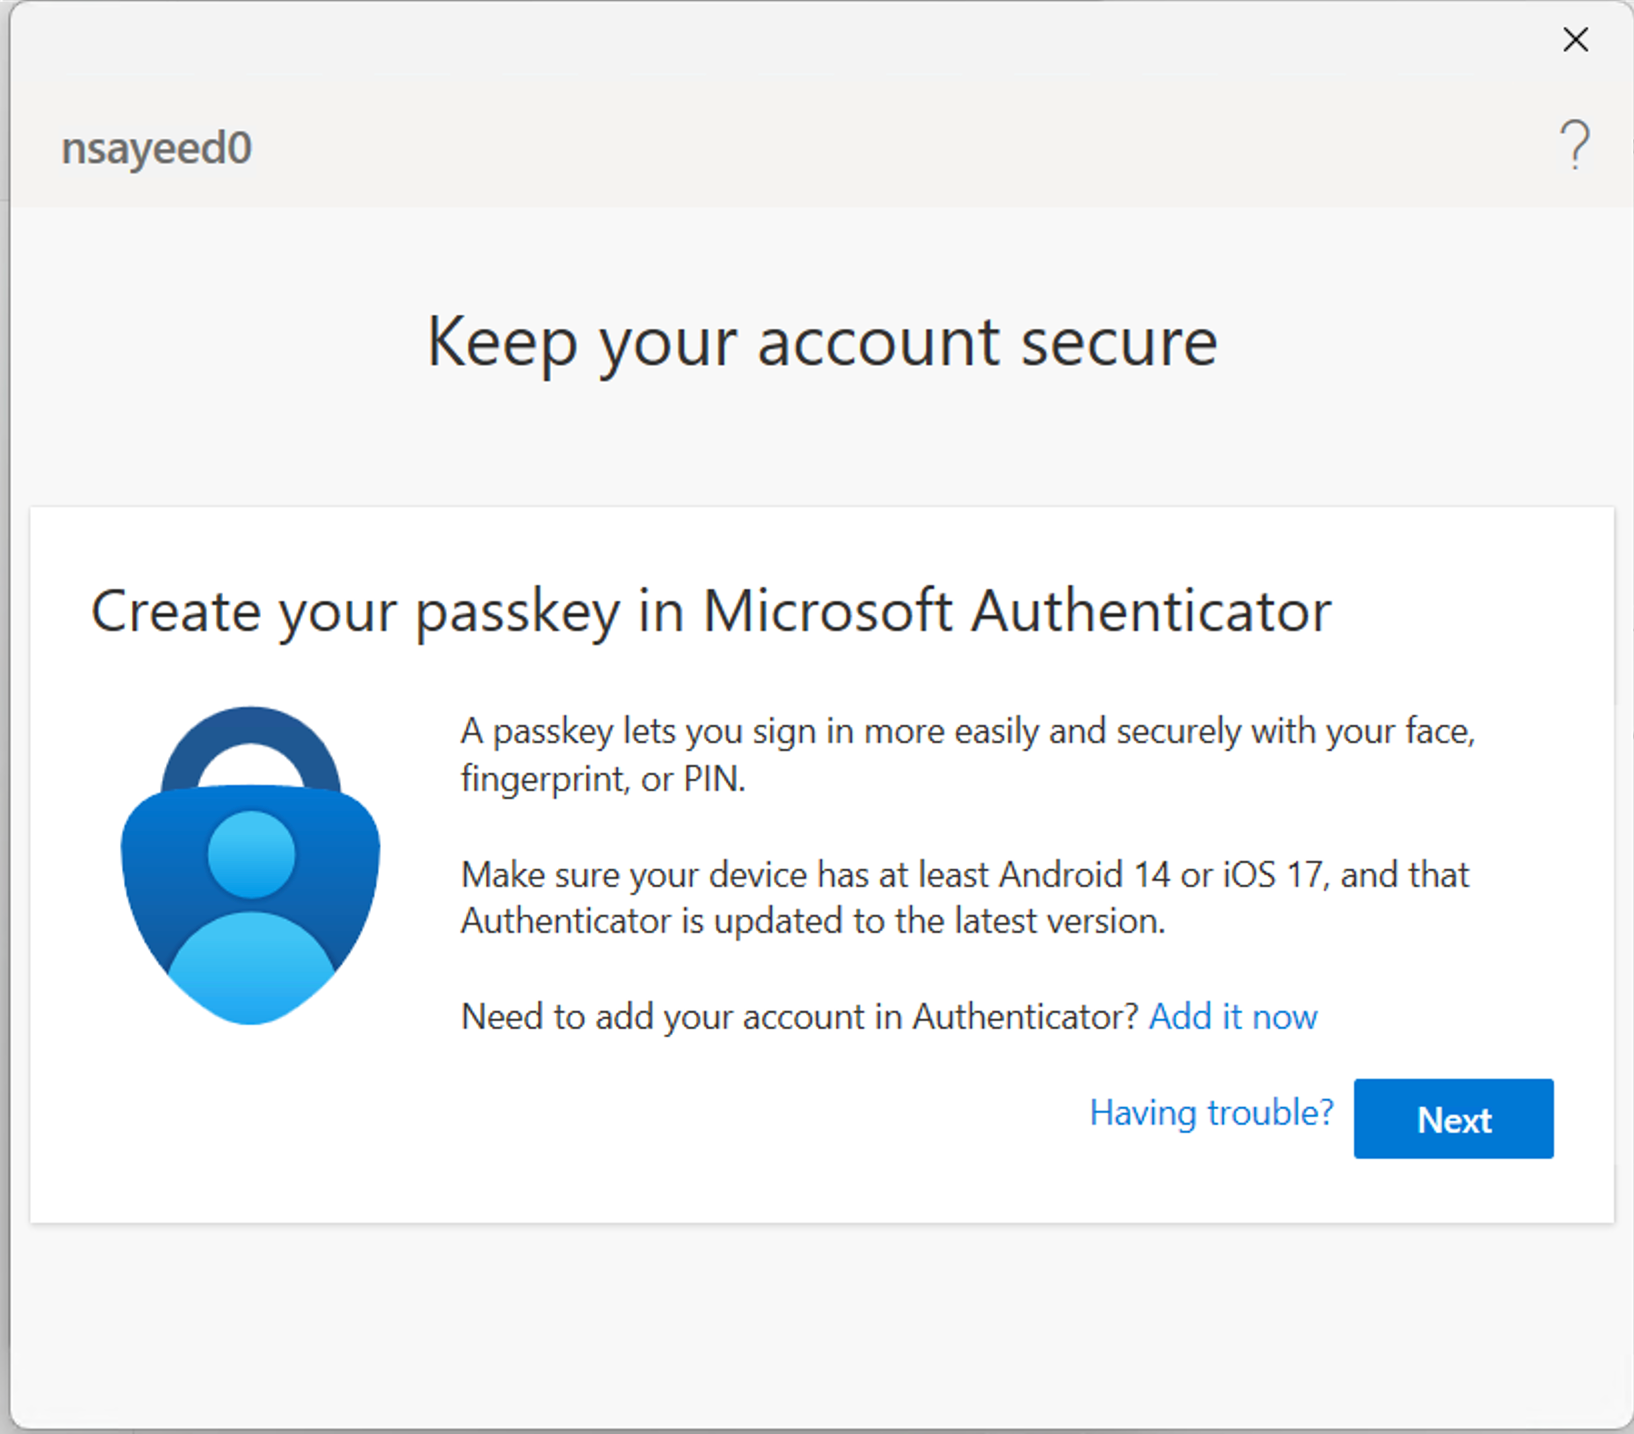
When attempting to access AdGuard, as I hadn’t set up a suitable authentication strength I was prompted on login to create a passkey
While this post focused on a subset of the available Conditional Access controls, it’s worth noting that Microsoft Entra offers a wide range of policies that can be applied to enforce granular access control across your applications.
Beyond what was demonstrated here, you can also configure policies to:
- Require approved client apps
- Enforce App Protection Policies for data protection on mobile devices
- Specify sign-in frequency to control how often users must re-authenticate
- Block access from legacy authentication protocols
- Control access based on user risk and sign-in risk.
These options allow tailoring of access controls for individual applications.
Privileged Identity Management
One final point worth briefly touching on is the integration between Microsoft Entra Secure Access and Entra Privileged Identity Management (PIM). When using Privileged Access Groups in combination with Entra PIM, you can enforce just-in-time (JIT) access and approval-based workflows for applications made available through Entra Secure Access.
This is particularly valuable for high-impact systems where continual access is unnecessary or poses unnecessary risk e.g. Servers with RDP or SSH access.
Conclusion
In this post, I’ve walked through the deployment process using a combination of my Azure environment and home lab, covering practical scenarios like enforcing device compliance, authentication strength, and quick access segmentation. Features such as Private DNS, Web Content Filtering, and integration with Privileged Identity Management further extend the control and visibility available to security teams.
While the product continues to evolve, it already provides a strong foundation for securing hybrid and cloud-native environments in line with Zero Trust principles, especially for organisations that are still operating a legacy VPN model.
As always, I’d love to hear your thoughts or experiences with deploying Entra Secure Access in your own environments. Feel free to reach out via the Contact page or leave a comment below if you’d like to discuss any of the topics in more detail.